


Oh my Git !!! You might hear this from a developer. Git is a boon to developers working on the same project as it allows them to branch out the code and work on it independently without actually affecting the original code. Git is one of the most widely used version control systems. Version control helps to keep track of the changes and records them so can you can recall any previous changes if needed.
Github is a cloud-based platform to create Git repositories. You will need to create an account on Github to upload your work to be able to share it with others.
If you are a beginner developer and don't know about Git yet, you are at the right place. In this article, we will understand the basics of Git and understand how it works.
Installation and Setup
Let's start with git installation.
You can download and install git from this link Download Git. Download the installation file according to your operating system.
After installation, you need to do some configurations which you can do by following this documentation.
Initializing git
To upload your code onto Github you need to initialize a local repo first. Navigate to your project directory and execute the below command.
git init
If you want to retrieve an existing repository you can execute the below command.
git clone [your repository url]
This will clone the existing repository onto your local machine.
What is a repository?
A repository contains all of your project's files and each file's revision history. It's like a folder where all your project files are stored. From now onwards we will call the repository "repo" as the whole developer community calls it that way.
Pushing code changes
What is the point of using Git if you don't know how to create a branch? Branches make it possible to work on the code independently, without worrying about damaging or messing with the original sane code. You can create a branch using the below command.
git branch -M main
Now that you have initialized the git repo and created a new branch you can push your changes. But before pushing if you want to check which files are modified you can check that executing the below command
git status
You will see something similar to this
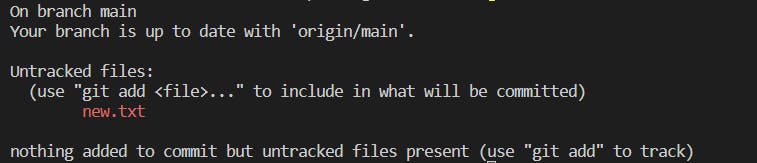
The first line says "On branch main", which means that you are currently doing changes in the branch named "main". This is the default branch created. You can later create multiple branches.
If you want to see what is the difference between your changes and the previous version of the code, you can do this by executing the below command.
git diff
It will show you the differences line by line.
Next, you have to do is
/*To add all files to the staging area*/
git add .

/* To add the particular file to the staging area*/
git add [file_name]
When you do git add your files get added to the staging area, which means they are ready to get committed.
To discard your changes and reset your file to the previous stage you can use the below command.
git restore [file_name]
Once you are ok with the changes, you need to commit the changes.
git commit -m "message you want to enter"
-m helps you to write commit message there itself. If you don't use -m an editor will open where you can enter your commit message.
Executing git commit will commit all your changes which will be stored in your local repository.
Finally, it's time to push your changes onto a remote repository, but for this, you need a remote repository.
Login to Github and create a new repository and copy the repo link which looks similar to this.

git remote add origin https://github.com/username/repo_name.git
git push -u origin main
Executing above commands will push your code onto the remote repository successfully.
As you have pushed the code onto a remote repository, similarly you can pull the code from a remote repository onto your local machine using
git pull
These were the few basic commands to get you started with Git. You can read more about other commands on Github's official documentation. Hope this article made you understand Git a little better.
Happy Coding !!!🧑💻